Shreddin’

Really it could go either way….slopes or crafting right??!
We are actually doing quite a bit of both around here. It is cooold still and school continues to be cancelled on random weekdays due to the cold, we were off yesterday and today for temps that were in the -30’s with the wind-chill! Luckliy every Friday the mercury climbs up to perfect temps for hitting the slopes, in MN we have great hills no actual mountains, but we don’t mind!
So we are bumming and skiing/snowboarding, it is polar (ha ha) opposite of the California version of boarding and bumming since we aren’t getting tan, but I could not have planned it better myself.
Mostly we are spending times off the slopes inside, so I am trying to keep a balance between reading, eating, bickering, and screen time…not all that easy!
Here is the project we did yesterday, inspired by this pin on pinterest.

This seemed like the perfect cold day craft….we have cardboard boxes and magazines laying around so we set to work.

I was not sure that I would be able to free hand draw a large shape that would resemble anything better than an amoeba, so I got our the overhead projector that comes in handy at the most wonderfully random times, I posted about it before here!

The kids got out their large bin of “figurines and animals” and chose the one that they wanted.  It worked best to lay the object on its side, and then we adjusted the projection to fit on the cardboard which was propped against the wall and then the kids traced the shape onto the cardboard in pencil.

Overhead scrapping

At first we were going to just rip the paper or cut it into thin strips, however with small hands it was looking chunky and not as uniform as we wanted.

So we employed the help of a paper shredder (which only momma was in charge of!), we borrowed from a kind neighbor, and shredded up old magazine pages.

The kids spent truly spent 2-3 hours gluing down the strips onto their shape…I mean quiet craft time is like silent gold am I right?!?!

At some point we ditched the white glue bottle and got out modge podge which is why some spots on the finished project are shiny…I would recommend this, it seemed to secure the paper better, and not leaves any loose spots that may tear off.

Ta da!

A Goat (by our 11 year old, completely independently):

Ebay 2014 629

An elephant ( by our 9 year old again independently) I just love the hair-do:

Ebay 2014 628 copy

A panda bear (by our 6 year old, mostly independently, she needed a little help gluing and staying on task at one point, but you can see she came back with vengeance and a black crayon for the background):

Ebay 2014 630

And who else? Pocahontas (by our 4 year old, she may have had some momma help;)):

Ebay 2014 659

Really an easy craft with what materials most of us have around the house, if you do not have a projector you can certainly free hand a shape, I am sure most of you out there have better art skills than I!

And just one more…proof that the sun does shine on MN hills!

A bombski

Storing Little Ornaments

Have you seen the Shining, with Jack Nicholas, when the family gets snowed into the hotel in Colorado and all go stir crazy??? Well we are not quite to crazy yet, but let me tell you we are shut in and staying, if you have not heard on the news, Facebook, or from friends and family Minnesota is in an “arctic vortex” or “arctic hurricane”. Today without the wind-chill we are sitting at a steamy 1 above zero, yesterday it was -45 with the wind-chill. The kids are home from school and we are staying put!
We are cooking and crafting and putting away all the last straggling items from Christmas and New Years Eve.
We have quite an eclectic collection of ornaments from over the years, honestly I am not sure where they all have come from, some were thrifted for projects that became leftovers, some were gifts and some just given to us, regardless we have boxes to put away each year.
I had pinned an idea about plastic cups glued to cardboard for safe and neat ornament storage which is perhaps some of the inspiration for this idea.
Super simple and maybe it has been done before, but I decided to reuse our egg containers, with 6 of us we go through a lot of eggs each week with breakfasts and snacks, so I had a few cartons laying around waiting to be recycled.
Here is what I did:

Egg carton ornament storage @patchworkreality

They fit perfectly, although we are avid recyclers, reusing is almost always better:

Egg carton ornament storage @patchworkreality

How happy does that little snowman look?  See you next year little dude!

A Nook that does not hold books and some that do.

I know that not everyone is on Pinterest and maybe you are and don’t “get” the big deal, but for me when it comes to projects and inspiration I am like a crack Oreo addict to that site.

We have a number of closets in our home, I am sure most of you do….but it seems like wherever the builder of this house had extra space he added a door and some shelving.  Great right…well some of these spaces are awkward and honestly putting a door in some places just seems to take up more space than you are saving.

My point?  I have 2 closet spaces that I am thinking would be great turned into more of a nook space:

1. One of the closets in our sons room.

2. The entryway closet.

What does this have to do with pinterest?

I have been pinning “nook” like spaces for at least a year…here are some of my tops for our sons room:

Traditional Home Design Ideas, Pictures, Remodel and Decor

houzz.com

His “nook” will definitely hold books and also serve as a desk space.

closet nook: compact, organized, completely cute, and the perfect use of space!

readingglssesshopper.com

Love the hanging organization in this desk nook.

closet made into kid's reading room

littlehellraiser.com

This is amazing and would have been perfect for my not-so-little-anymore bookworm, but now that he is in middle school he needs a desk space.

Desk

4.bp.blogspot.com

Last but not least, I love the clean lines of this  and the shelving for books.

For the entryway I need a place that has bins and  shelves but also still has hanger potential,  without detracting from what might work for others if we sold the house. This has to be a nook without books.  I have some ideas how this will work in our space, and here are some photos that I am drawing ideas from:

Hall Closet turned mini mud closet

housetweaking.com

Love this with the bench and hooks, plus those baskets for mittens or hats or shoes, but there are 6 of us and that might not cut it in MN winters.

Front closet turned mudroom. The shoe rack is brilliant!

cultivate.com

hello storage!!!

Hallway closet nook

Last one, again love the bench hooks and storage underneath.

Anyone else turned a closet into a nook space and LOVE it?

I am hoping to share some exciting changes around here soon!

Upcycled Rustic Initial Carved Headboard

When we redid some of our garden space we had some leftover 1 X 8 boards.

Santanna’s bed does not have a frame and these boards have been sitting under the deck for almost 2 years, giving them a great distressed patina.

As Jon and I were talking about how to cut up…or not…the boards and how we attend to arrange them to go over her full size bed I fell more in love with the look.

I decided instead, they would go in our room…over our king sized bed.

We had taken off an outdated headboard and have also been discussing how to upcycle that one.

Headboards are apparently a big deal at our house..who knew.

I wanted to headboard to go past the bed a little so that when the bed is made the headboard would extend at least the length of the bed + bedding, the headboard is a total of 96 inches and goes about 6 inches past the bed/bedding.

Headboard

The back of this headboard has 3 1 X 4 boards placed so the end 2 can attach to the metal be frame and one in the middle for support, you could use 2 X 4 or even 4 X 4 board for the “legs” if you want to change the look, I wanted a sleek profile, plus we had all the boars for this in the garage making it FREE.

2013 June 836

When I was dreaming up Santanna’s headboard I had some thoughts about drawing some sort of graphic on it, she still might get a headboard so I won’t spill those thoughts yet.

I thought a saying that might fit, but honestly there was not one that I LOVED, so I thought how about a carving?

Aha!  Initials in a tree….Awwww..right?!?

SO I used our generic Dremel tool, which I think I killed while doing this and carve d our initials, First name and Middle initial, per Hubby’s request.

2013 June 835

It looks rustic which is great, this was not as easy as I thought it would be, hence some minor imperfections, but I do love the way it turned out.

I did not carve the heart; I painted and sanded all of the heart and initials to give it an aged look.

2013 June 838

On the other side I added the year we were married in paint, I did many different layers and wanted that too look aged as well, I am not sure that it is exactly how I pictured it in my mind, but I can’t say how often my vision and the end product correspond.

Plus it is more discreet then the carving.

2013 June 834

I have to say we are loving this, and that is was FREE from some repurposed garden boards makes it feel special.


Frozen Raspberry Lemonade Popsicles

Today marks the official first day of summer…I know some of you have been enjoying summer weather for a while, but blue skies and wispy clouds combined with higher mercury readings are finally here in MN!!!  Yeah!!!

That means little bodies are heating up and taking to the water.  At our house my kids are huge fans of anything sweet that comes from the freezer.

This is a rendition of a recipe I saw on-line and tweaked a bit.

None of the ingredients in this are hard to find or really all that great for us…(read: no paleo here;)), however it is a treat and as treats go, they are not usually broccoli…am I right?!

Ingredients:

  • One box of Raspberry Jell-O (you could really use any flavor, strawberry would also be really tasty)…8 serving size.
  • Lemonade mix, enough for 8 servings, more or less depending on your tartness preference.
  • Water
  • Ice
  • Sugar (Optional)
  • Dixie cups
  • Plastic spoons or Popsicle sticks

Ebay 1589

Boil 4 cups of water and stir in Jell-O, lemonade and any sugar if you like to sweeten your mixture.
Add ice cubes to a glass measuring cup, add water to equal 2 ½ cups total, then add to Jell-O Mixture.
Pour into paper cups; I put mine into a muffin tin to keep it steady for the little helpers I had, also to catch the drips.  I also used a funnel to help keep things neat. Put in freezer for 2 hours.

Ebay 1591
After 2 hours they should only be partially set. This is when we added plastic spoons, I did this so little hands could hold onto then better and avoid a stick, put back into the freezer for another hour or two. This made about 14-16 pops with the Dixie cups approximately 3/4 full.

ENJOY!!!!

2013 June 658

DIY Oak Hardwoord Floors.

I shared the pretty; now the nitty gritty.

Here is how is went down…almost literaly.

We let our wood acclimate to the house for a little more than 2 weeks, more than recommended but with all our crazy weather and rain we wanted to make sure it was not too humind, which can lead to gaps in flooring later.

We tore out the carpet.  And by we , I mean Jon, Solomon and Avalon had it up when I brought the other 2 kiddos home from an activity one evening, I came home to them pulling up the tack strips, that held the carpet down, they rolled up the carpet and then rolled up the pad, the bottoms of both had some staining from juice and other spills, reaffirming our choice to go wood.

Carpet Tearout

This is the sandy stuff that was right at the seam of where the carpet had met our existing hardwood floors, I am thinking it is  a combination of,  well dirt and sand 😉  and the backing of the carpet that just sort of falls apart over time. Ick!

Carpet dust?

We cleaned the sub floor which was in excellent shape, it is only 7 years old, by vacuuming and a small warm water/soap spot clean where needed.

Then we laid down tar paper, as a sound and protection barrier between the sub floor and the oak.

Tar paper

Since we were installing this up to existing hardwood flooring we knew it was going to be fairly level but we double checked to make sure that the new pieces going in were level.  We also had to face nail in the first boards since there was a small trim piece that we had taken out and the tongue part of the connecting board was not there.  Face nailing means to nail it into place through the top of the board, we did this with small finish or trim nails and then filled the small holes with putty.

Then we set to work staggering our boards to make sure no board ended at the same spot, and nailed them in place.

After about 4 or 5 rows we would cover it with a red builders paper or rosin paper, to protect the unfinished wood.

When we got towards the end of the rows Jon would cut the last piece to fit exactly in place, this is where some real skills come into place, there will be a piece of oak corner round along the wall trim, but you need to make the end floor pieces fit as close to the space as possible.

Below you can see how we staggered the boards and covered them and toward the wall is where you can see boards would need to be cut to fit.

Floors

Also if you are taking out carpet to put in hardwood you may and you have a heating/cooling vent you might have to cut down the register if you are putting in wood grated with your flooring, I do not have pictures, but Jon cut our down easily with a sawsall, be careful when cutting the metal for sharp spots!

The last few board of the flooring have to be face nailed again, at least our were since the nail gun would not fit close to the walls.

After all the flooring was in we rented a sander from Menards, and they had 3-2-1 sanding pads for sale that fit the machine, 3 being coarse, 2 less coarse, and 1 the fine and final sand.  They did not think I would need the 3 but I brought it home anyway and I am glad I did because there were some spots that the wood was higher/lower and he 3 took care of this quickly, the 2 would have taken a long time.

Sander

Once it was all sanded and smooth, we wiped the wood down with lightly damp clean rags, just enough to catch all the dust but not soak into the wood.

Oak Flooring

We let it dry and then did 4 coats of an oil based polyurethane.  The poly we chose was the one we thought best matched the existing floors.

2013 May 700

I think we got it right:

Oak Flooring

Again the before and after:

Living RoomOak Hardwood Floors

Tools used for this Oak floor DIY  project:

  • Hammer
  • Small crowbar
  • Screwdriver
  • Sawsall
  • Rented Orbital Sander
  • Painting wand and pad
  • Wood floor Nailer
  • Putty Knife
  • Level
  • Saw

Cost for this DIY Project:

  • Oak flooring and 2 registers:  $814.74
  • Disposal fee for old carpet and pad:  $25.00
  • Nailgun: Free (borrowed from my Dad)
  • Nails for the nailer: $25.92
  • Tar Paper and Rosin Paper: $7.45
  • Wood putty : Free (again we had this on hand)
  • Sander rental and 3-2-1 pads: $43.39
  • Polyurethane and painting pad( we used the handle we already had): $83.05
  • Tools: Free (we had all of them on hand from other projects)
  • Labor: Free 🙂

This project totals : $999.55

Just under a G, bids on this were around $2500.!!  We saved over 1/2 by DIYing this floor and we LOVE it!!

It did take most of Memeorial weekend, but that included many interruptions from those that are now pitter pattering around on this beautiful floor.

So I think most could be this done in a weekend but each coat of poly needs about 3 hours between them, so if you did more than 4 coats it will add time to the job.

Shiny Happy Floors

I am going to get right to it…our new floor:

Oak Hardwood Floors

Now if you have been here all along you might also notice that something else changed…

Lets review shall we?

Here is the before of this space, after we moved out our furniture:

2013 May 418 copy

Previously we were using this as a living room

2011 June 1819 copy

But we traded out this:

2013 June 174 copy

For this:

2013 June 171 copy

And this:

2013 May 415

For this:

2013 June 170 copy

We did a living room dining room flip, I love that our new flooring goes throughout the whole space, the carpet always left us feeling like we needed furniture on one side or the other…don’t cross the line!!

This was a complete DIY project, it took us one long rainy plus weekend and it was about 300 square feet.  Cost and details are coming.

Plus we built a new Master Bedroom headboard for FREE!

Stay Tuned!

And if you see carpet be gentle, she took the break up hard, but she was good to us for almost 7 years, trustworthy,  and loyal, but she had secrets; hid too many things, we needed a smooth shiny new floor, one that wouldn’t hide spills…it was us, not her…you know.

Upcycled Jewelery Oraganization

Is it May already…and almost 1/3 over. I am still pushing foward on the NYR to become more oranginzed.

Organization in our house is a constant battle, a good one, but hard-fought non the less.

With 3 girls, the princess accessories are at an all time high, but I am sure it is just the tip of the iceberg.

At her recent campout birthday party, Raiven received a few new special accessories, she has pierced easr, has been acquiring necklaces and bracelets from relatives and friends, and thrifting. Until this project she was hanging them on a wooden drawing doll, is that what it is called?

I accidentally deleted a whole card full of photos…ugh! So the before shots are none existent..but here is what we did:

I had 2 black picture frames that were thrifted or the glass has brokern out of, I was tired of tripping over them but knew I would find a use from them….eventually.

When I saw this I decided to upcycle the old frames to organize our oldest daughters jewelry.

We spray painted them in Raiven’s color choice.

Then Hubby cut, he is the type A to my relaxed type B, and attached chicken wire to the frame.

He attached them to the wall with hallow all sinkers, since they were not on a stud, we wanted them securely in place.

2013 May 058 copy

WE added these hooks to the chicken wire, we crimped the top set closed so they are fixed in place, but we left the others uncrimped so she can move them around as she likes.  These are from Menards, but I am sure any hardware store has them.

2013 May 059

The other side we did not put any hook on, we left this one for earrings so she can just loop them over the wire.

2013 May 055 copy

I made the yellow beautiful art on her wall, inspired by one I saw on Zulily.

She is thrilled with this new addition to her room, and is really lets her showcase all the special jewelery she has, as most of it has been gifts.  It also gives her the independence to choose what she wants to wear and gives her the ability to easily care for her special jewelry.

2013 May 050 copy

We’ve Got Wood

Seriously …number one in speech writing is an attention getter right?!? Well I am applying that to blog writing and titles..today.

Yes we do , we have wood: white oak unfinished 3 1/2 by 3/4 inch various length hardwood flooring,  wanna see??

Ebay 929

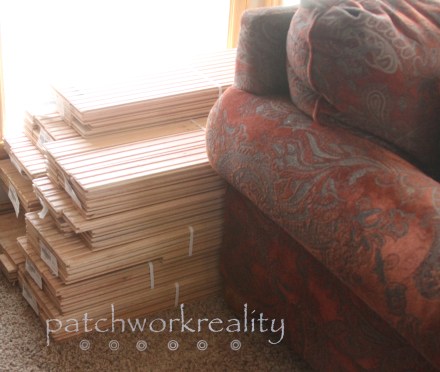
We have it set behind the love seat in the living room so it can “acclimate”, so that when we put it down, nail it in, sand it and clear coat it, we don’t end up with any seams shrinking and gaping open.

Ebay 930

The salesman at Lumber Liquidators said it should sit for about a week to 10 days.

Ebay 931

Can’t wait to show some progress on this pile of wood.

Exercise Room

Still working on organizing the house, from my New Years resolution.

This pace used to be our office, we had 2 desks on each end, after the kids went to be Jon worked on his homework and I worked on Ebay/blogging.

Jon recently bought a laptop and can work wherever he likes  and I have moved my office into the unfinished, large, laundry/craft room.  I just have so much inventory it was not enough space and kept spilling into the living room.

Here is a picture from our living room:

raiven 022

Notice the exercise area behind the futon?  Well it is gone!  During my Fab Five February I sold the futon and the recumbent bike!!

This living room downstairs, serves as the TV room, a playroom, you can see the dress up on the middle left side of the picture, and until recently a workout room.

This space needed less responsibility!

So we moved all exercise related items into the old office and viola! No more exercising in the living room. (living room pic still to come)

Some before and after shots of the new workout room:

Notice there are glass french doors so I can close them if I need/want to.

Before.                                                                After

Ebay 552 (2)Ebay 565 (2)

Before                                                                  After

Ebay 554 (2)Ebay 567 (2)

Before.                                                             After

Ebay 555 (2)Ebay 569 (2)

Before.                                                            After…my 7 mile run at night…hence the lighting.

Ebay 558 (2)Ebay 572 (2)

I still have  a few things that I would like to do in this room:

  • Add some audio/visual maybe take down one shelf dn add a small TV, definitely something for music.
  • Take out the wireless modem..move it into the office.
  • Add some inspirational sayings? Wall art?
  • Relable the Ikea bins, since those no longer house shopping bags and mittens/hats 😉

It feels so good to have a clean space to exercise inside, so I can run while the littles nap, and since spring has yet to get here, I may need this space for a while.

We do have a gym membership to a fantastic club in town, but it is nice to have this option. In about 3 years will all 4 of our kids are in school full day I will probably sell the treadmill and run at the club or outside.  AS an avid runner this is still a vital piece of “home decor” for me.